As well as providing high-quality affordable log cabins (see the homepage for our great offers), we also like to help our customers construct their log cabins.
This guide on how to build a log cabin shows and tells you how to make your building look perfect.
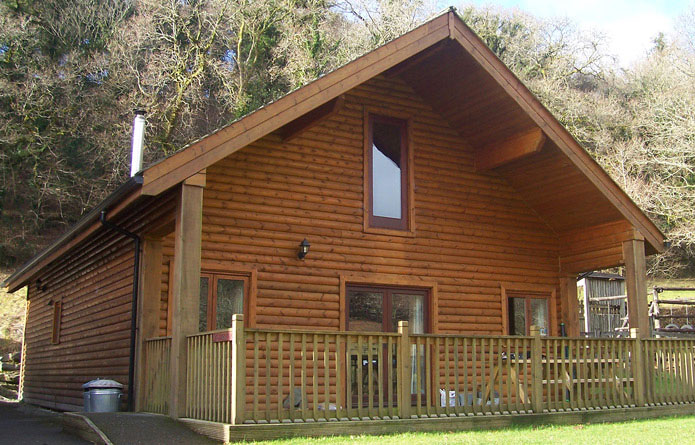
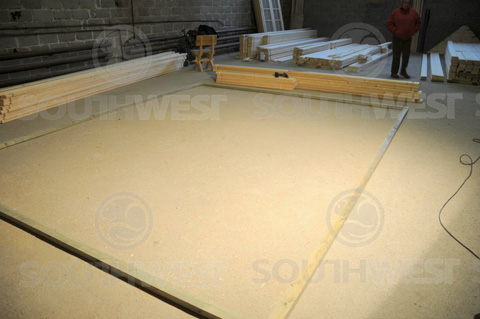
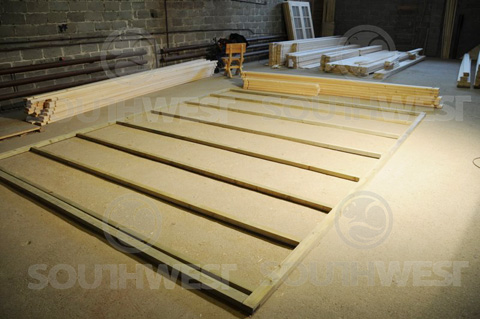
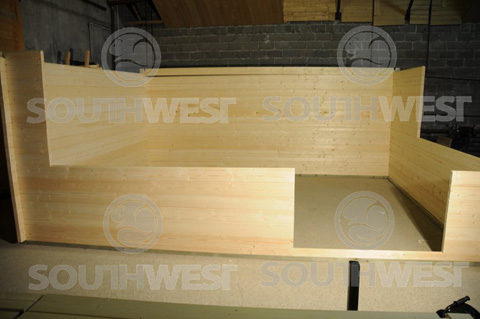
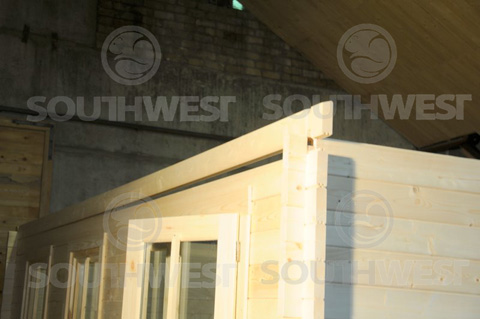
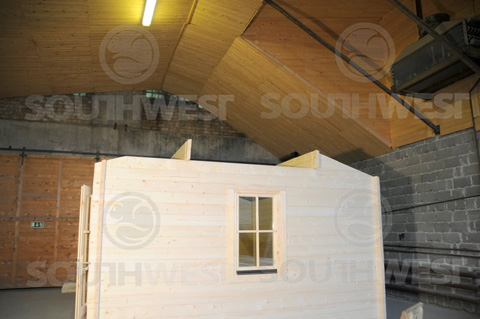
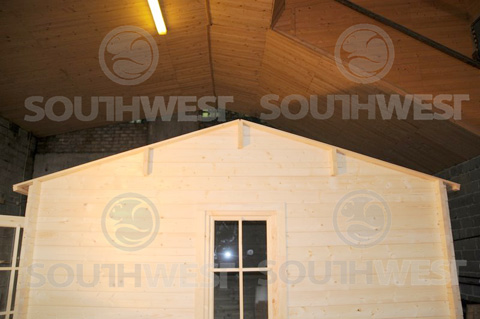
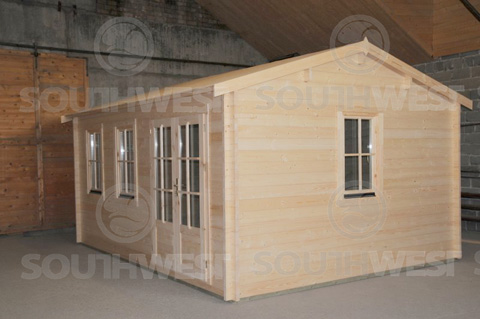
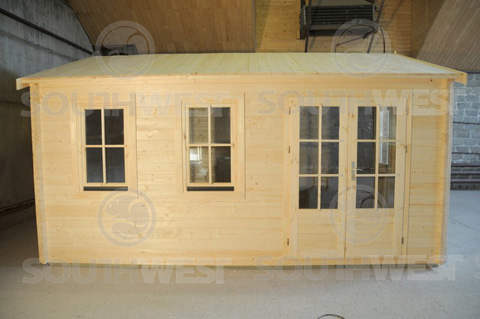
Below is the log cabin we are going to build in this guide. As you can see we have built this log cabin indoors, but you should construct your log cabin in it’s intended position. You wont be able to move it once it is constructed.

Before you get started…
Before you start to construct your beautiful new building here are a few things that will help.
- You need a level base on which to build your log cabin. We recommend a level concrete base.
- Please familiarise yourself with the planning permission laws, and gain planning permission if necessary.
- You need to treat your log cabin as soon as it is constructed to protect it from the elements. We recommend using a good quality exterior wood treatment such as Jotun DemiDekk or Butinox. These are available from reputable paint suppliers.
- It really helps to have someone else help you put the building together.
Tools
We recommend the following tools:
- Spirit Level
- Screwdriver
- Measuring tape
- Hammer
- Saw
- Pliers
- Drill
- Knife
- Ladder
- Clear silicone
- Assembly drawings
- Protective gloves
OK, lets get started…
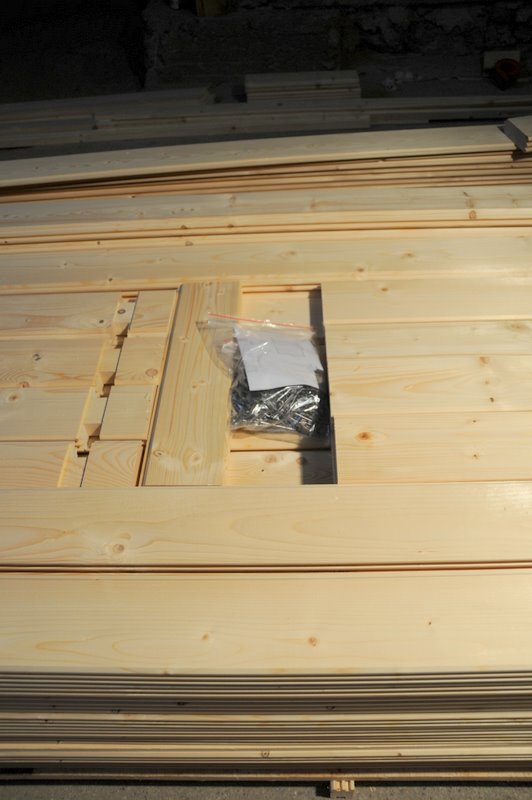
1. Carefully unpack the cabin and check all components are present
Inspection of components
Open the packages and sort the components according the wall plans on Installation Drawing and Component Specification. Don’t be surprised to find some extra logs for walls, 2-3 floor boards and roof boards – some extra components are there just in case of any damage in transit or during assembly. Important: never put components on dirty surfaces, or grass as it will be very difficult to clean them afterwards.
2. Ensure base is level and square. EXTREMELY IMPORTANT!
A proper and good foundation is a deciding factor for safety and duration of your cabin. Only level, rectangular and capable to take load of cabin foundation can ensure the problem-free installation. Faulty foundation will lead to out-of-shape walls and as a result doors and windows will be impossible to regulate. The upper edge of the base should finish at least 5cm above the ground level so that the cabin is not in direct contact with ground water.
Recommended foundation options:
Cast concrete bed. Concrete strip foundation. Concrete slabs or pavement slabs.
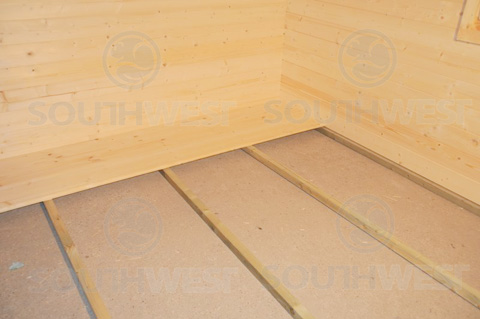
3. Lay the out the green tanalised bearers for the floor
The base timber is treated against decay, as well as the floor joists.
We recommend you place a layer of DPC (damp-proof course) on the base first. The log cabin packs contain green tanalised bearers which will sit on the DPC, and the log cabin will sit on these bearers.
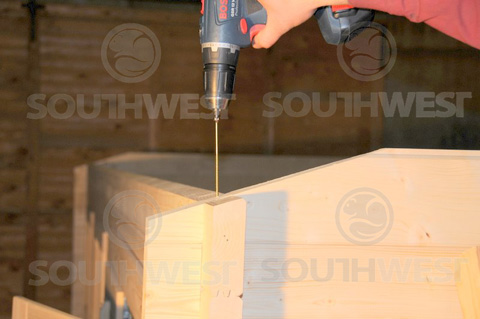
Ensure that the frame is laid completely flat. Fix the lap joints with wood screws.
Check the diagonal measurements to make sure the frame is square (both diagonal measurements should be the same). Install floor joists and fix them.
ADVICE: As extra protection from storms, you may want to fix the frame to the foundation with steel angles or anchors. (The fixtures to the concrete are your choice and not supplied with the cabin).
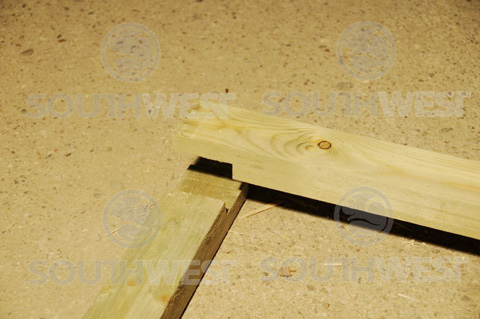
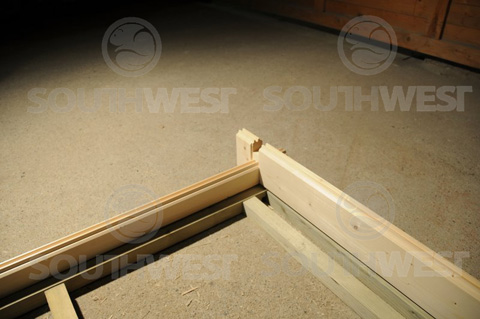
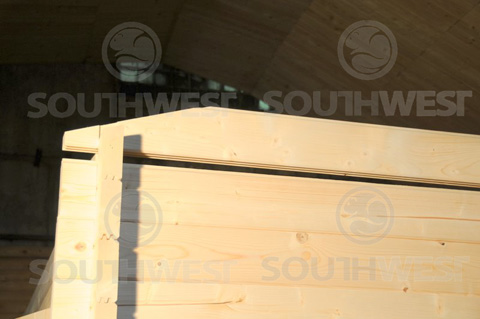
The bearers lock together in each corner as shown below
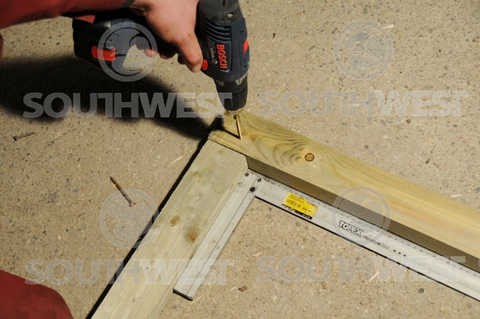
Now screw the bearers together as shown below. Use a set square to ensure the bearers are square.
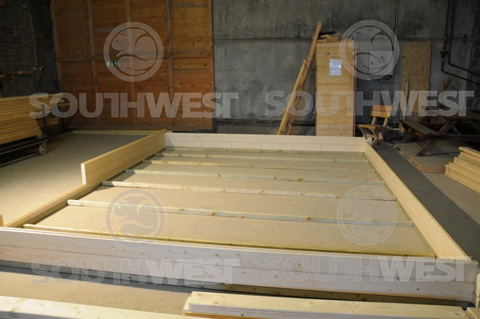
Once the tanalised frame is complete add the remaining tanalised sections inside the frame, as shown below. The outer frame supports the walls, the inner sections support the floor. Ensure all of the bearers are sitting on DPC.
Note, if the base is built such that the cabin is open to the air underneath, we recommend laying OSB boarding under the base timbers to prevent vermin entry into the floor void.
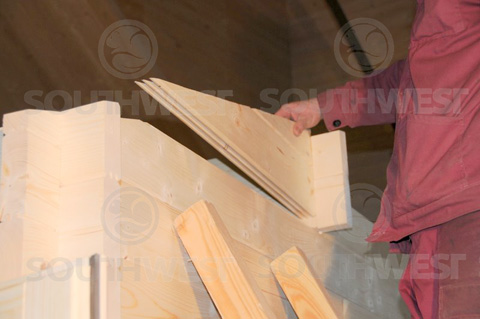
4. Separate the wall components
Separate the wall components into individual stacks corresponding with each of the walls to avoid any unnecessary confusion later on. With rectangular buildings ensure you separate the long and short sides.
5. Start building the cabin walls
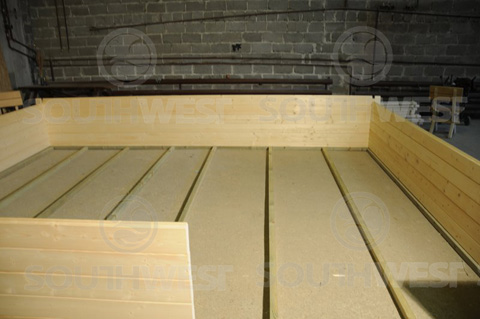
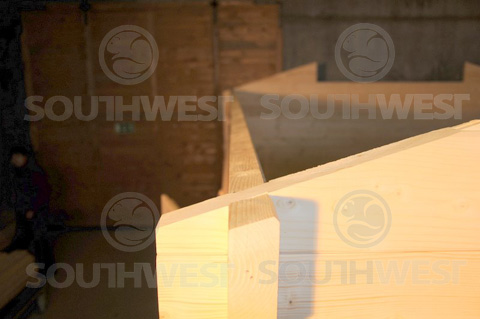
The walls of the cabin are built by adding layer upon layer of timbers. The first row sits on the green tanalised wood laid earlier. In the image below you can see that the timber on the left is laid first, so that the timber on the right interlocks over its ends. This is the principle of interlocking cabins. The end locks the side pieces into place.
Remember – all wall logs are placed with tongue up. Make sure all tongue & groove joints are fitted properly in each row of wall logs.
Follow the wall drawings, starting with half logs, and fix them to the foundation frame before proceeding with next row of logs up.
IMPORTANT: after you have the first row of logs installed, measure the diagonal lengths to check it is still square. If necessary re-install the logs. You can only proceed with next row of logs if base frame is square.
Keep adding more timbers, ensuring they lock together. You can see the second layer being added below.
Continue to add more layers building the wall higher, as shown below, until you have walls high enough to install windows and doors.
6. Fitting the windows and doors
In the picture below you can see the gaps in the walls that are ready to receive the windows and doors. On the right of the front section is the gap for the door. On the left of the front is an edge for the window.
Doors and windows come in ready for installation units that slide into the opening from above. Doors always open outwards. Tilt & Turn windows will always open inwards.
IMPORTANT: we recommend you do not fix the door/window frames to the wall logs. If you decide to do so, you should fix them with a couple of screws in the lower part of the frame only, as when the logs dry out the cabin will settle and door/window frames will be damaged/distorted.
IMPORTANT: Final adjustments and tuning of the doors and windows can be made only some 2-3 weeks after the cabin installation, when cabin has adapted to weather conditions and atmospheric moisture, and the logs have settled under the weight of the roof. When adjusting the doors you will need hexagonal keys, spirit level and angle to check positions of frame and door and then align the door by tuning the adjustable hinges with the hex-key.
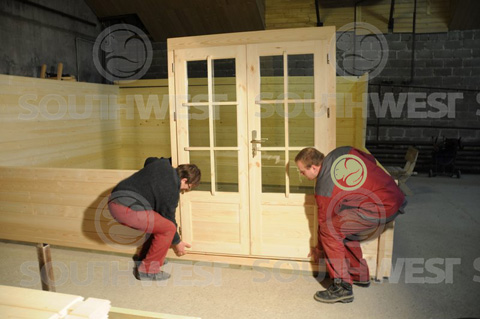
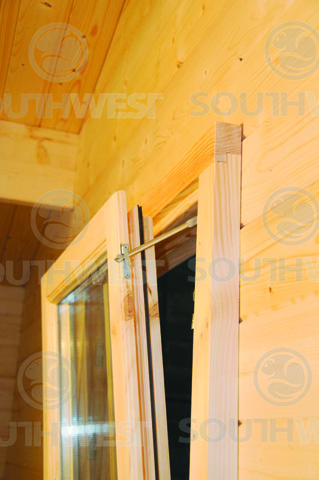
Fit the door and windows into position by slotting into place, as shown in the image below.
[Note, it is possible to fit the doors after the cabin is constructed. The doors are placed into the door opening on completion of the build and the door trims/fascias added once it is in place]
Note, the doors can be very heavy.
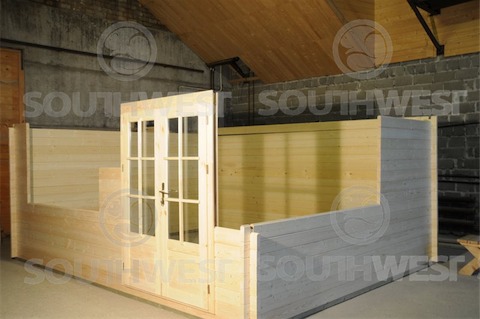
The image below shows the door in place. To the left of the door smaller timbers have been inserted to make the gap for the window.
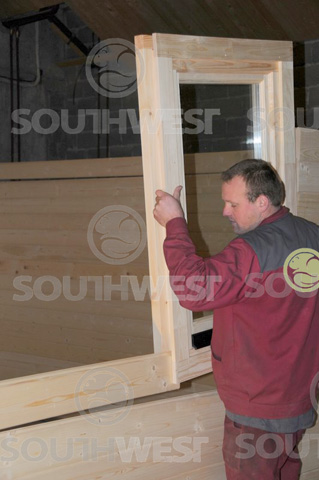
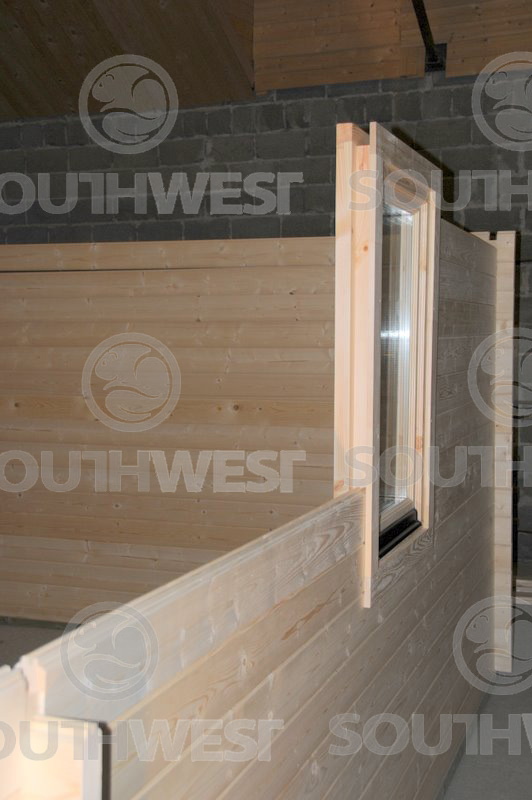
The window slots into the wall, as shown in the image below. Note how the next timber is being inserted at the same time.
In the image below you can see the fitted window.
IMPORTANT: Windows and doors must be painted inside and outside with water based paint. A bead of clear silicone must be run around the outside beading to glass seal.
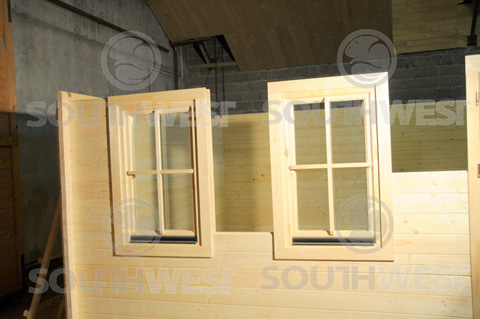
The log cabin we are building in this example has two windows side-by-side. In the image below you can see that small timbers have been added to the left of the first window to create the gap for the second window. Slot in the second window just like the first.
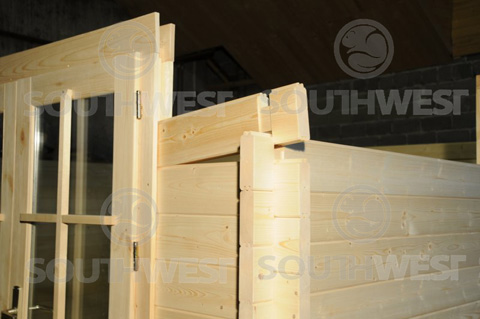
In the image below you can see the remainder of the wall being finished by fitting the end interlocking timbers. The interlocking timbers finish the wall securely.
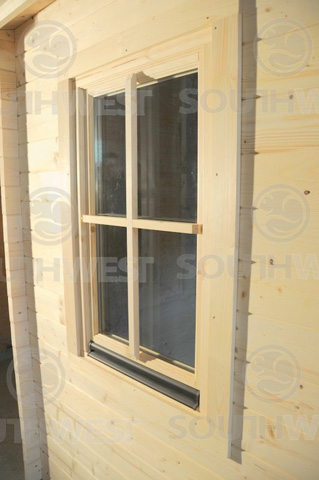
In the image below you can see a smaller window fitted to a wall.
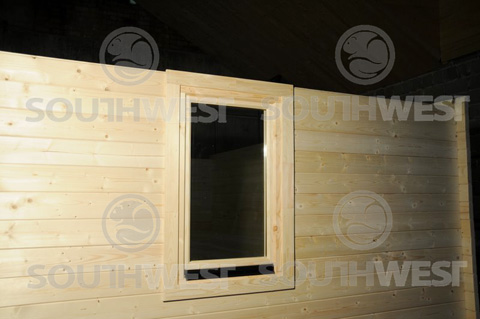
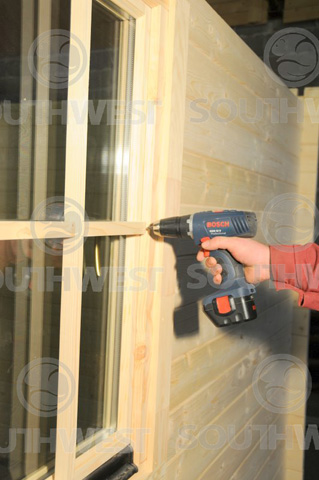
Screw the window trip to the outside of the window frame as shown below.
Finish the wall by adding the remaining timbers, as shown below.
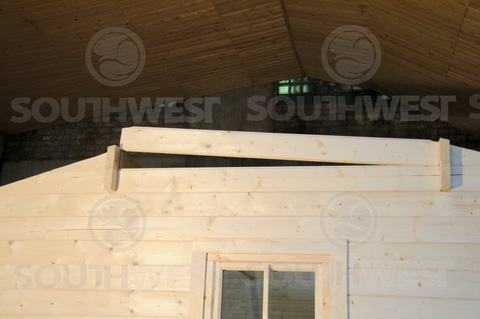
7. Build up to gable ends then place ready cut roof purlins into position and fix with parts supplied
Once the walls are complete we are ready to add the gable ends, as shown below.
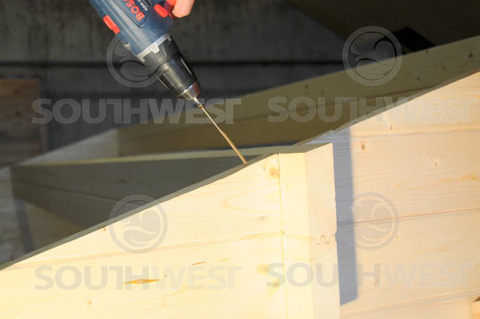
Apexes are notched to accommodate the roof beams. Keep checking the roof beams with a spirit level before fixing them to the apex. Apexes must be screwed to the top wall logs at the ends.
ATTENTION: If you notice the upper log not on the same level with the apex then check all wall logs below to make sure that tongues are properly fitted into grooves. Tap the wall logs to get them into the correct position or plane the apex and/or side wall log to get them in line for roof boards installation.
Secure the last wall timber with a long screw.
The finished wall is shown below.
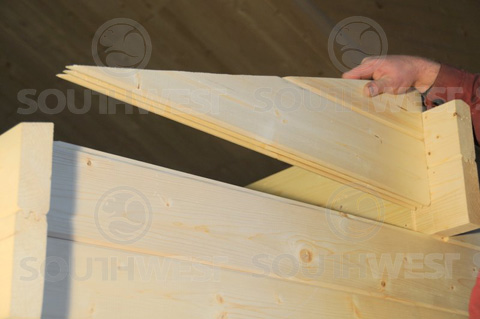
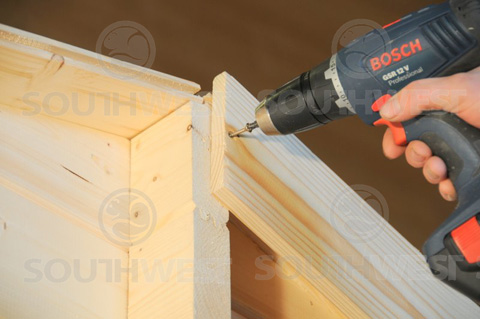
Position a gable end and offer the roof beam up to it, as shown below.
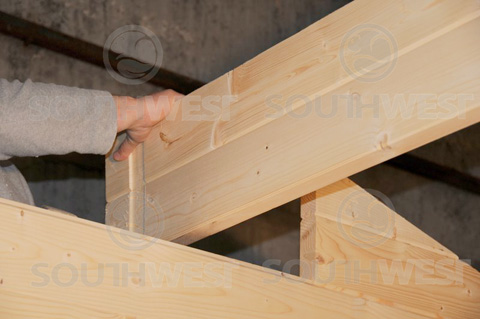
Add the second roof beam.
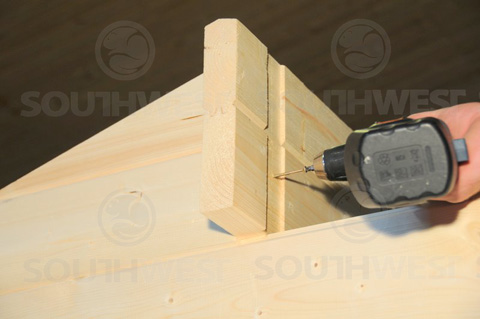
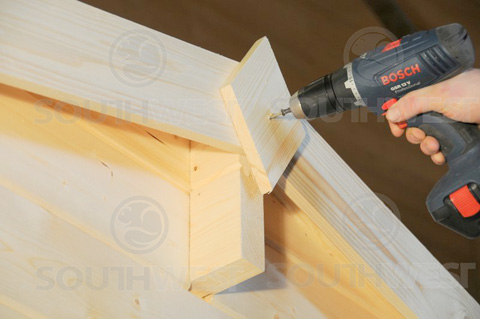
Add the remaining gable fixings as shown below.
Then secure the gable fixing into the timbers below.
Add the remaining gable end timbers to complete the wall.
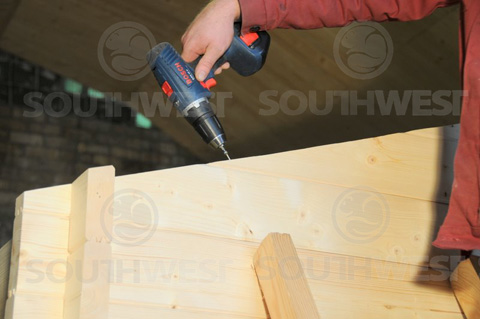
Secure the roof beams by screwing as shown below.
Add the gable fixing detail for the other side.
Then secure the fixing by screwing as shown below
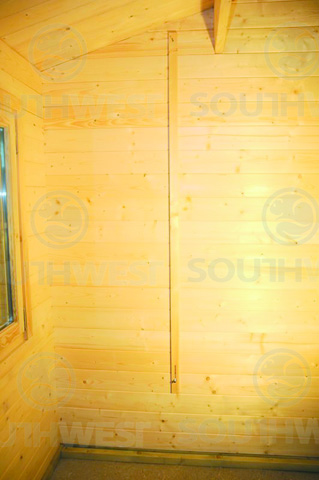
8. Add the storm brace to the inside
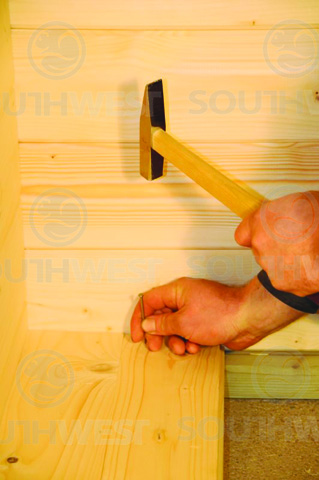
The storm braces should be screwed on the inside of the walls as shown below.
The purpose of the storm braces is to prevent the roof being lifted by strong winds. In many cases it is just a precaution measure, but we always recommend tying the apexes to the walls using strong screws. There is an elongated hole at
the bottom of the walls and a round hole to the apex for this purpose. The screw in the elongated hole must be left not too tight, to allow for movement of the wall logs.
9. Nail roofing boards into position
Now that the walls are complete we can add the roofing boards.
Before you proceed with roof boards, check if all walls are completely level. Start with roof cladding from the front edge of roof, smooth side of board up. The roof boards have a chamfered V on the front face. This is the face you look at. Tap the boards lightly and make sure you push the tongue into the groove, but leaving about 1mm expansion gap, to allow for swelling of the roof boards.
ATTENTION: Use a stable and secure ladder, don’t step on the roof. The cabin structure is safe for even loads (roof shingles, snow, wind, etc…) but is not designed for point loads.
Roof boards must be even with roof beam ends, the last board must be trimmed with a saw.
Add the underside roof trim to the roofing boards by screwing in from the top.
Below you can see the completed roof from the gable end.
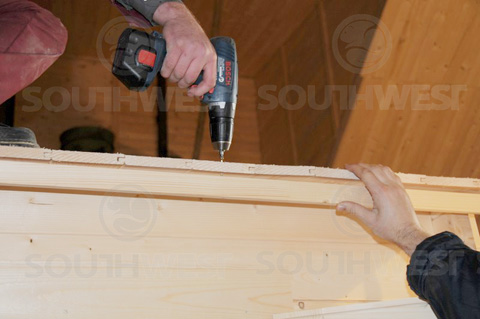
10. Fix fascia boards all around
Screw the fascia boards on to the log cabin end, as shown below.
Also add any trim, such as this diamond.
11. Fix the roof covering
Roof covering is not supplied with the cabin as standard. You should follow the manufacturer’s installation instructions for your chosen product.
For insulated roofs, battens are provided that are fixed over the top of the roof boards, creating a void that can be filled with insulation. OSB sarking is then fixed to the battens, providing an even substrate for the roof covering.
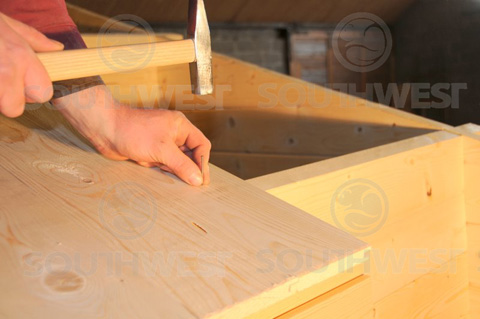
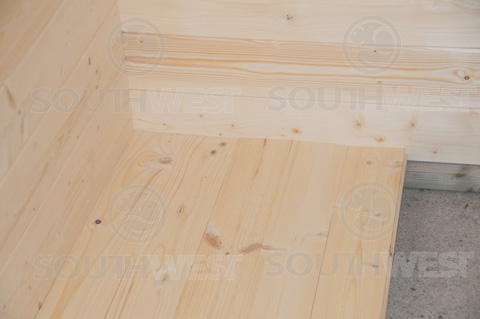
12. Fix floorboards into position
Once the cabin is built and protected from the elements you can proceed with the floor installation. Place the floorboards on the joists, tap them lightly against one another and leave about 3mm expansion gap between them. Use secret nailing when fixing them to joists through the tongue at an angle. If necessary, cut the last boards to the required width, leaving about 5mm expansion gap to the wall. Floor beadings will cover all expansion gaps between wall and floorboards. Beadings
must be cut into required lengths and fixed with small nails.
ATTENTION: Depending on time of the year and weather conditions, floor boards may swell or settle. Dry wood will absorb moisture from the atmosphere and cause the floor to expand, therefore leaving expansion gaps is a must.
In the image below you can see the floorboards resting on the floor joists.
Add more floorboards, locking them together, until the floor is complete.
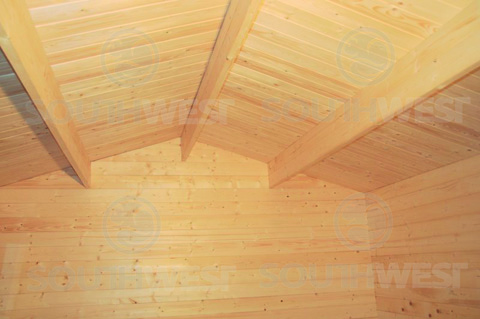
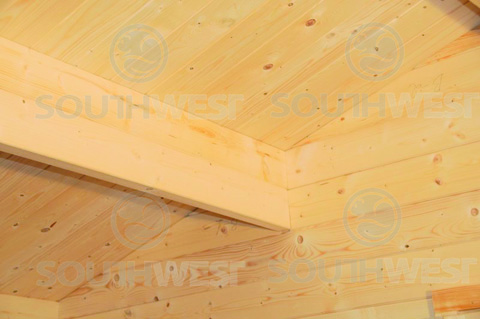
Finished log cabin pictures
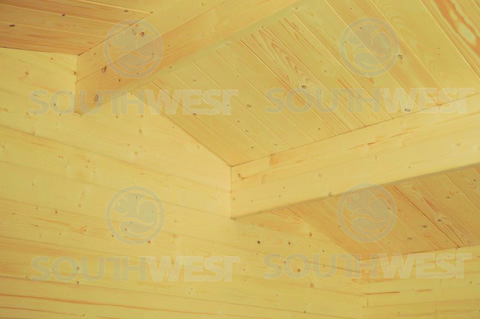
The ceiling:
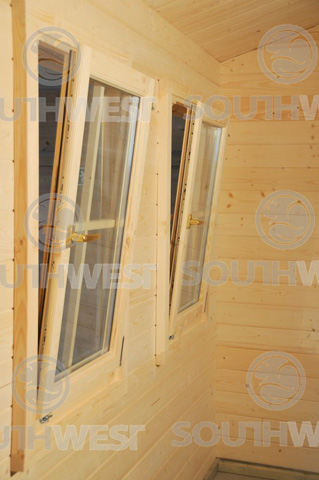
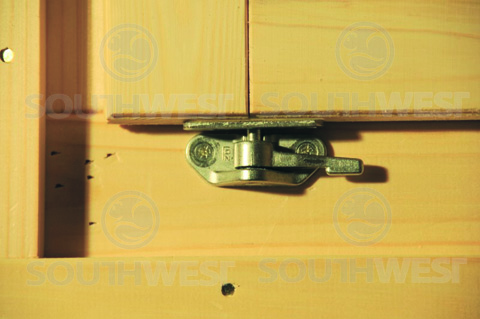
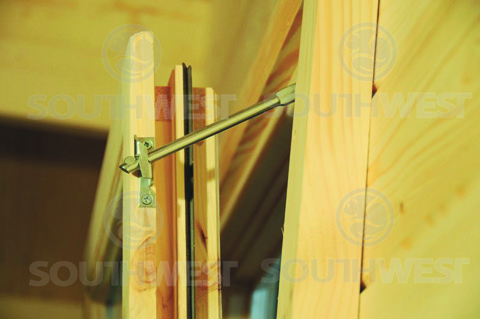
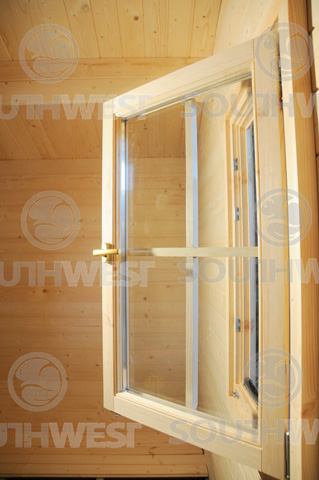
The finished windows:
Completed door:

IMPORTANT: Windows and doors must be painted inside and outside with water based paint. A bead of clear silicone must be run around the outside beading to glass seal.
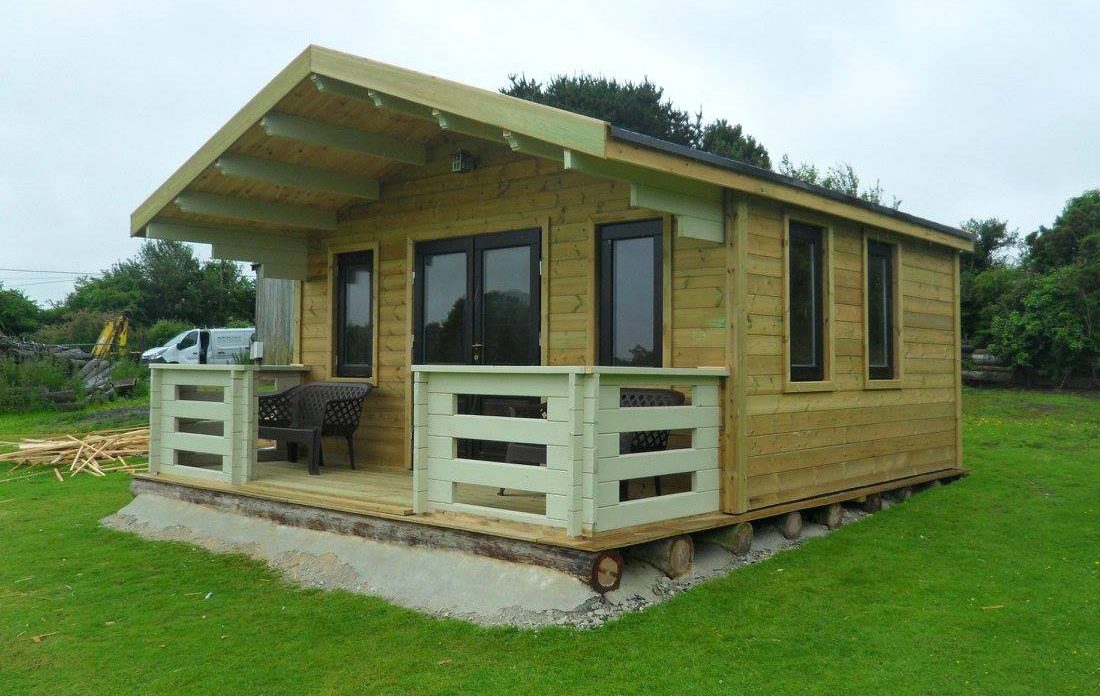
The completed log cabin:
Painting
Wood is a natural material and must be protected from moisture and UV radiation. If left unprotected, wood will become grey and get mould or staining. Your cabin must be treated with exterior grade wood stain immediately after installation.
Doors and windows must receive a multiple layer of exterior grade stain or paint, INSIDE AND OUTSIDE, otherwise wood may absorb moisture and doors/windows can get twisted and/or stuck in frames.
When applying stain or paint, use high quality materials and tools, follow the paint application manual, and avoid rainy weather and strong sunshine when painting.
Finishing Guide
It is vital that a good quality branded product is used to protect and decorate your new purchase.
We recommend the use of Sikkens, Jotun and Sadolin translucent woodstain systems, particularly for external use.
Please try staining a small area that is not visible to check that you like the colour before staining the entire door, window or walls. Sadolin Extra Durable Clear Coat retains the natural colour and beauty of the timber without significantly affecting the original timber tone (light coloured timber will acquire a light
golden hue). This product requires a minimum of 3 coats application to bare timber. For advanced protection and lasting colour we recommend the Sikkens colour system.
Sikkens Cetol HLS Plus is a single application base coat that absorbs into the timber providing excellent adhesion for subsequent coatings. Cetol Filter 7 contains ultraviolet light absorbers for advanced protection from the sun, offering superior durability.
These products can be found at many reputable DIY outlets.
Maintenance and troubleshooting
Having properly installed, finished and painted your cabin, it’s lifetime is increased substantially. We recommend that you inspect the cabin thoroughly every six months.
The possible problems are:
Gaps appear between the logs.
Cause: something is preventing logs from settling/expansion.
Solutions: If door/window frames were attached to wall logs, release them.
Storm brace is fixed too tight – loosen it’s attachment.
Upper logs of cabin sitting on the window frame
Remove the door/window linings and cut a bigger gap between log and frame.
Gutter piping does not allow for movement of wall logs
Loosen the pipe attachment.
Doors or windows stuck or difficult to operate.
Cause: The cabin walls or foundation has settled.
Solution: Check whether cabin is level.
Window/door frames not level
Adjust them accordingly to get back to rectangular shape, frame stiles must be vertical, and jambs strictly horizontal, all angles 90 degrees.
Cause: The windows/doors have swelled due to moisture
Solution: Adjust door/window hinges; if necessary, plane the door or window off a few mm.